 So, I know that people have been re-creating Snapchat filters as makeup some. Nikki Tutorials has done some, I seen in Glamour where a whole fashion show used Snapchat Filters as their makeup inspiration. I thought it was so cool, and even though I'd done a few in the past I really wanted to step it up though for Halloween. Mainly because, these would be so cool for a group of friends to do for a party or maybe an at work theme for you and your co-workers to do for Halloween if you get to dress up. A lot of them are really easy to do. So I wanted to do this, then I asked my friends to let me make them into some filters as well, and then I tagged some of my makeup friends to try it too.
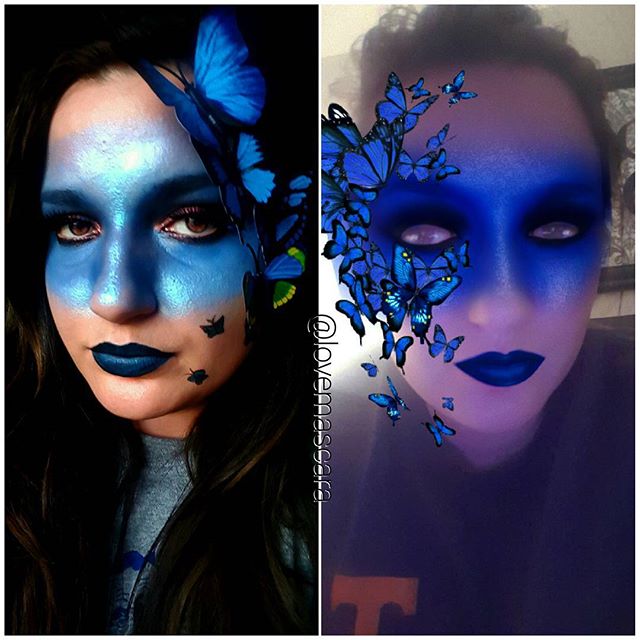
So I'm just gonna start with the actual ones I done for Halloween, not the ones I had done previously. My first one was the Blue Butterfly mask filter. I actually went a little extra though and bought some blue butterflies to stick on my face. Which made this super easy. Plus they were super inexpensive, I got them off ebay. So for the blue mask. It was so easy and you didn't have to be really careful and detailed with it. I used Ben Nye cream paint in blue with a regular wedge sponge and applied it all over the face as the base. Then I set it with Neptune shadow from Makeup Geek. The mask also has a super highlighted and shiny look. so I used a few different duo chromes. Starting with the Milk Makeup Holographic Stick which is a duo chrome it self. I went over it with Makeup Geek duo chromes in Sugar Rush that has a teal duo chrome, and then Black Light duo chrome that has a purple-y blue duo chrome. I mainly went around the edges and then down the nose with this. Around the eyes is super smokey with black shadow. Not precise at all. Just very blown out. I actually already had a shadow on so mine doesn't look as black as I wanted but I did use Corrupt from Makeup Geek over top of it. Plus, I added lashes. I didn't even worry that much about brows. I kinda defined them some just so they wouldn't get lost but I didn't sculpt them. Next up, I used Tarred black lip liner from OCC to darken the the outer parts of the lip. The only blue lip color I had was Bondi Beach from Ofra which is a bit brighter of a blue. So I needed a darker lip liner to make this work. However, if you have Echo from KVD that would be perfect. I used Ardency Inn Punker Liner for the two little butterflies that I drew myself. Use my code "LOVEMASCARA" for $$ off your purchase if you want to. Then I just glued on the butterflies for the final 3d effect. This was super easy. I love messy looks that don't require a lot of thought, or precision with them because it's very hard to mess those up. You could use blue paint from Walmart Halloween section even. I get my Ben Nye paints from Frends Beauty because they offer so much for SFX, not just Ben Nye. They have Mehron, Kryolan, Temptu, etc. So depending on how much you want to invest you could get a few colors, a color wheel or even entire palettes. Sign up for their free membership and you get 10% off your purchases. So stay tuned for more Snapchat Filter Makeup and if you re-create any then feel free to tag me because I'd love to see it! My Instagram is @lovemascara and my Snapchat is: loveandmascara follow me on there as well, I do a lot of tutorials and mini reviews. I hope to see you try some of these and keep an eye out as I add to the series through out the month.
0 Comments
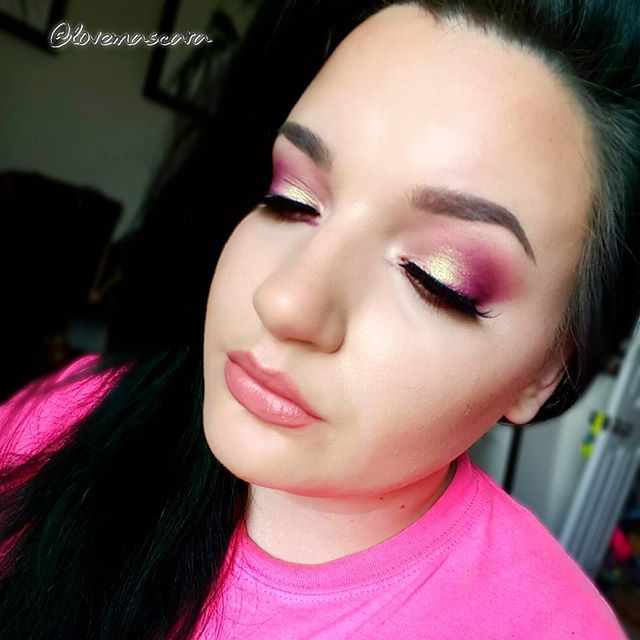
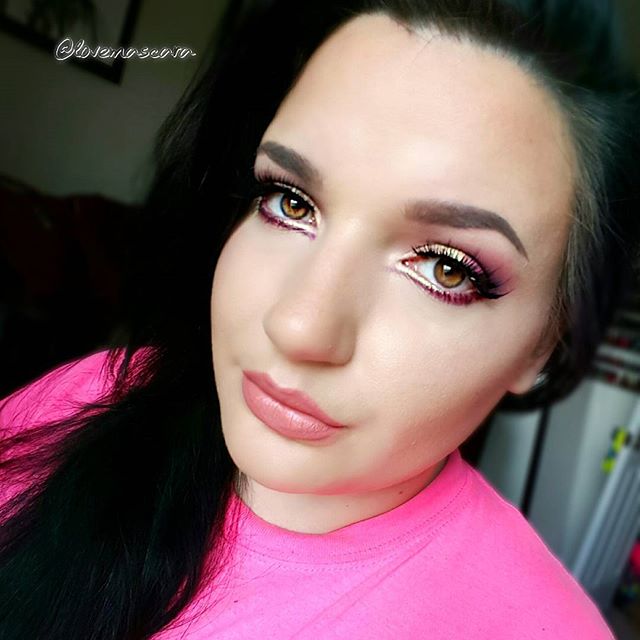
 It's football time in Tennessee!! Time for parties, cookouts, and tail-gating. Which means you, my friend, are gonna need makeup that will hold up through all the festivities. So I'm bringing you some sweat-proof, cheer proof, food proof, drink proof, etc makeup that will last you to the after party. First up you're gonna want your base to be prepared for a full day of talking, cheering, hugging, possibly fighting (just kidding that's bad sportsmanship), and so on. So I would choose a great basic moisturizer with no extras and for that I go with Sanitas Oil-Free Moisturizer. This works for all skin types including dry. It's not going to add extra oil to your foundation or change the finish of it and that's why I like it. Next is primer, obviously. However, picking the correct primer is essential so there are two that I'm gonna include. First is the Make Up For Ever Mattifying Primer if you have combination/oily skin. Second is the Make Up For Ever Smoothing Primer if you have normal, dry, or noticeable pores and texture. I don't recommend it for the oily skin types because the silicone in it can cause the oil production to be more noticeable in my opinion. For foundation I have two as well. For combination/oily and also normal skin I would go with ABH Foundation Stick. It's super light weight. It's a drier formula that doesn't get super dewy or transfer and it's good medium but build-able coverage. For those who need more coverage I would totally go with the Milani 2 in 1 Conceal and Perfect foundation. It super full coverage and it looks beautiful. It's quite thick in formula but it covers nearly everything so you won't have to touch up near as much and you won't need a ton of concealer either. Speaking of concealer there's really only one I recommend and that's the Lancome Effacernes Waterproof concealer. This is specifically for the under eye but I would think it could be used on the rest of the face as well. It's waterproof and it does not budge guys. It's not thick and cakey, it looks beautiful. I recommend this for anytime you need your concealer to do work for you all day long. For powder I really recommend baking and for baking I only use RCMA No Color Powder. It's the best, it's affordable, and by baking your makeup it just locks it in even more and makes it nearly bullet proof. For eye shadow primer there are a couple I like which is Wet n Wild Photo Focus Eyeshadow Primer and the Benefit Stay Don't Stray eye primers. For glitter I use the NYX Glitter Glue. I think game day's are always appropriate for glitter, by the way. As far as shadows go I like super pigmented shadows that won't have fall out as the day goes on, so you don't have to worry about cleaning it up all the time. So Makeup Geek is my first choice and then Juvia's Place. For liner definitely get a smudge proof and waterproof liquid or gel liner. I love MUG Immortal Gel Liner, Ardency Inn Punker liquid liner (my code LOVEMASCARA will get you 15% off), and Colour Pop Swerve gel liner. I don't recommend crayon liners or putting it in your water line because it'll end up in the corner of the eye in no time flat. If you are going to do that though take a mirror and the liner with you because you will need to touch it up often. For mascara use a smudge proof and preferably water proof one (keep in mind that waterproof mascara is quite hard on lashes so I don't wear it unless it's an event). My fave is the L"Oreal Carbon Black Voluminous mascara. Go easy with highlight unless you are incredibly dry with no texture issues at all and then...go hard if you want. I find that as the day wears on the more intense highlight can look and while that's cool it can also magnify pores. So I would go with a subtle highlight, if you want to highlight at all mind you. I would probably use Laura Mercier Baked Highlight in 01. You could also go for a matte highlight which doesn't "glisten" but still gives that "lifted" effect and use Benefit Dandelion Shy Beam. As for bronzer/blush/contour. Use whatever doesn't oxidize on you and keep it pretty neutral. Again though, baking will really help lock in things like contour and what not. It's never a bad idea to take a brush so that you can blend out any patches you make get from touching your face in despair or stressful times during the game, etc. For lips you can go two ways, 1). liquid lipstick that is a neutral color that when it fades off (cause it will) it won't look nasty or crumble while you scream at your team from afar. I recommend Tarte Nameste or ABH Stripped possibly. 2) go for a sheer tint that will wipe off easily but never noticeably. For this pretty much any of the Lancome Juicy Shakers would work, the YSL Tint Oils are also good or pretty much any tinted balm or sheer lipstick. However keep in mind if you are out in the heat, balms or lipsticks will melt. Even liquid lipsticks get more messy and even more liquid in hot packaging. Remember to set your face, even if you don't think you'll need it, just do it. I like Ben Nye Final Seal, Blue Marbel Setting Spray and also the Urban Decay setting sprays in All Nighter and Chill. If you're super dry and get very patchy I would choose Chill from Urban Decay. Some of my oiliest friends though swear by the All Nighter and the Ben Nye. Blue Marbel and also Green Marble is often what drag queens will use and lets face it they're always fierce. So as for makeup that's all I can offer you but whoever you're cheering on be safe and have fun! 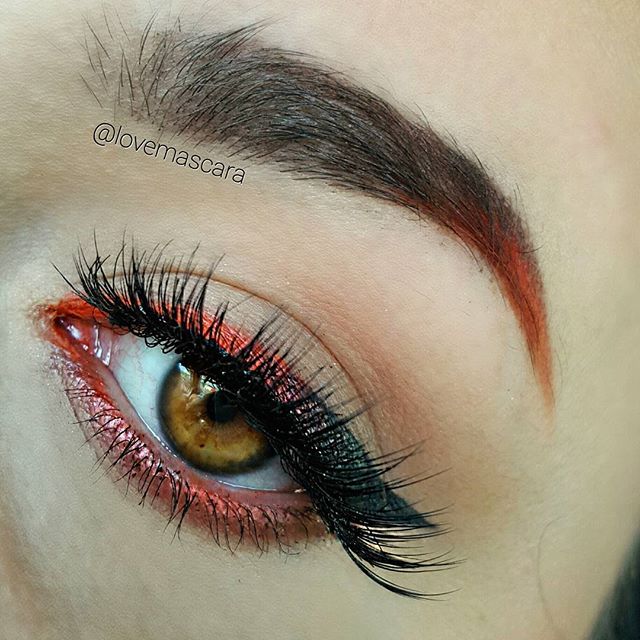 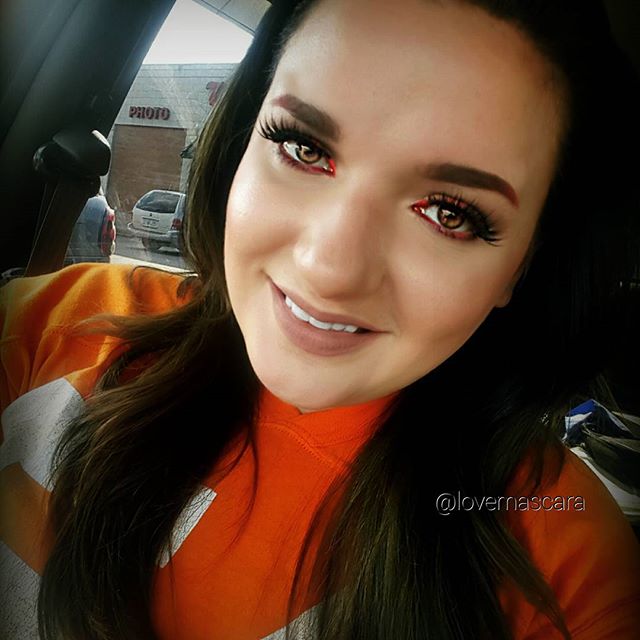 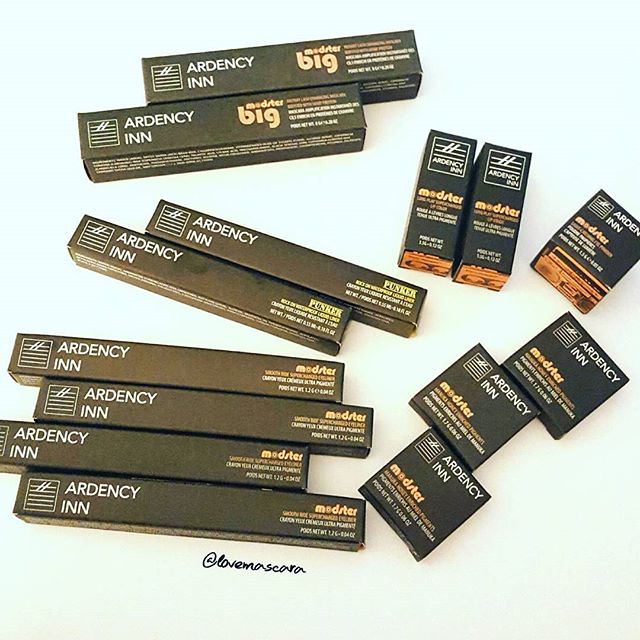 Last week Ardency Inn sent me an awesome package of everything up above. They also made me an affiliate with them which I'm very honored that they wanted to do that. Basically I just wanted to give you an overview of their products because I've been using them for about 2 years and I really do love them. I honestly don't even know where to start. So I guess I'm gonna start with what I know the best which is their eye shadows. They are Manuka Honey Enriched Pigment shadows aka: super intense. I have 5 shades all together. My favorites being Royal and Rose Gold. Royal is a gorgeous Royal Purple. It's a true purple not so dark that it looks black. The shade Rose Gold is a darker rose gold in my opinion with not a ton of pink in tone. The other shades I have are Peacock (duochrome of teal and red brown), Copper, and Sunday. Copper needs no description its straight up copper a light toned copper. Sunday is a true gold. All of these are wonderful, I've not been disappointed by a single shadow yet from them. Next Punker Liquid Liner. I was running out of mine so I'm so glad they sent back ups. Not only is this a waterproof but it's jet black and very pigmented. Some liquid liners are not as opaque black they're almost sheer or too thin in liquid to where they run on you. So this doesn't budge, it makes a fierce wing, and I also use this in artistry for detailing or drawing for costume makeup or sfx makeup because this gives you a lot of control. It's also more of a matte black finish and not shiny black. Which I like. They sent 4 Modster Supercharged Eyeliners. The colors are: black, gold, blue, and brown. I definitely wanted black to use in my water line. Everyone talks about how great it is in the water line. I find it is definitely the creamiest for the water line but it doesn't stay there. So if you're gonna use it for that then take it with you for touch ups much like you would with other eyeliners. Next is the Modster Big mascara. I actually really like this! Typically I don't like many mascaras. I do like this one though. The brush is curved and quite big but I like how it builds up the lashes. I have short, thin lashes and this isn't clumpy or messy at all, at least for me. I have two Modster lipsticks in shades: Valentine, and Love Cat. Valentine is a great warm rose neutral shade. Love Cat is a classic red. They feel great. As with any lipstick you'll need to re-apply as the day goes on but I love them, they're very pigmented and creamy, which is all I ask in a lipstick really. Lastly I have a loose pigment in Friendly Fire. It's a white duo chrome sparkly shade. I love loose pigments, this is no different. It has a sifter which makes life so much easier. I'm SUPER pumped for this. I'm gonna leave some pics below of me wearing some of the products. You won't be able to really tell with the mascara but hopefully other things you will. Some products I haven't gotten to use just yet but I will, trust me. 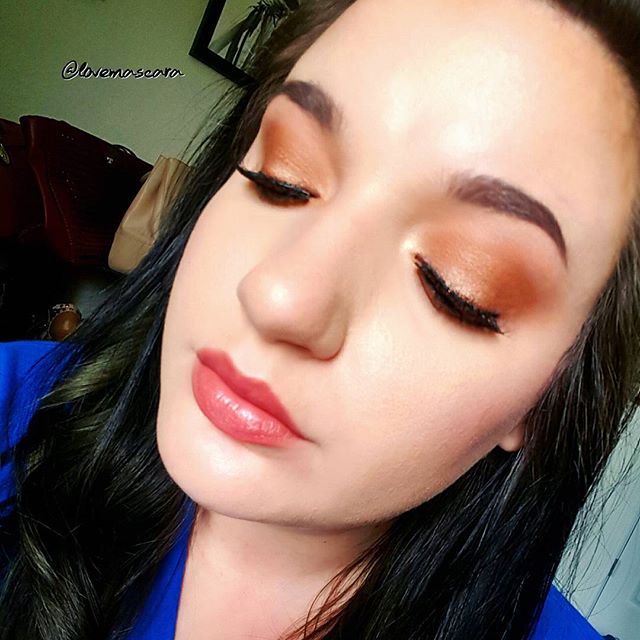 Here I'm wearing Copper on the lids and Valentine on the lips. 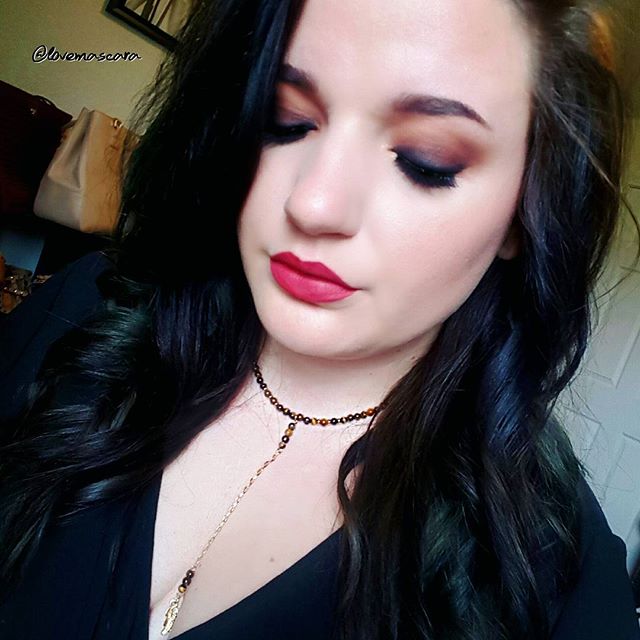 Here I'm wearing Modster Supercharged liner in Black and it's smudged out. 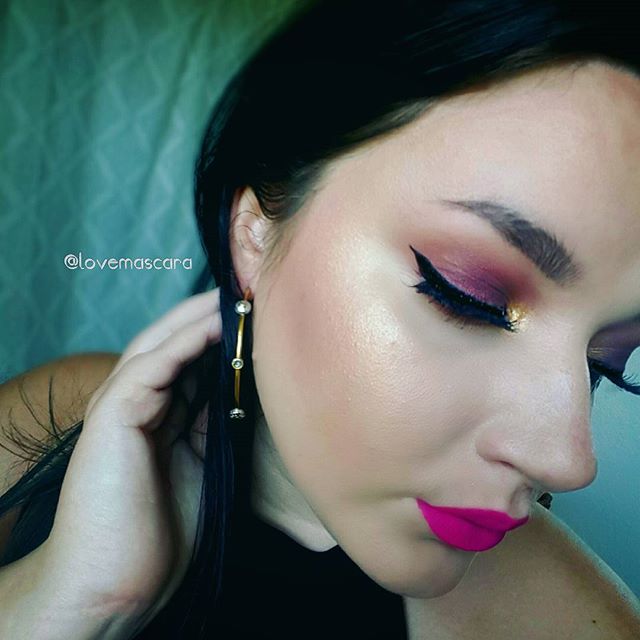 I'm using Punker liquid liner for that ferocious wing you see right there. 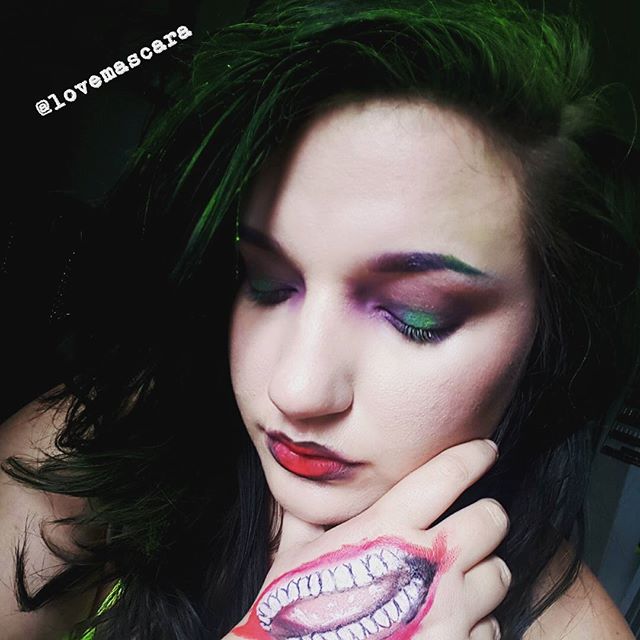 I used Punker liner for the drawing and also Royal eyeshadow for the purple in this "Suicide Squad" Joker look. 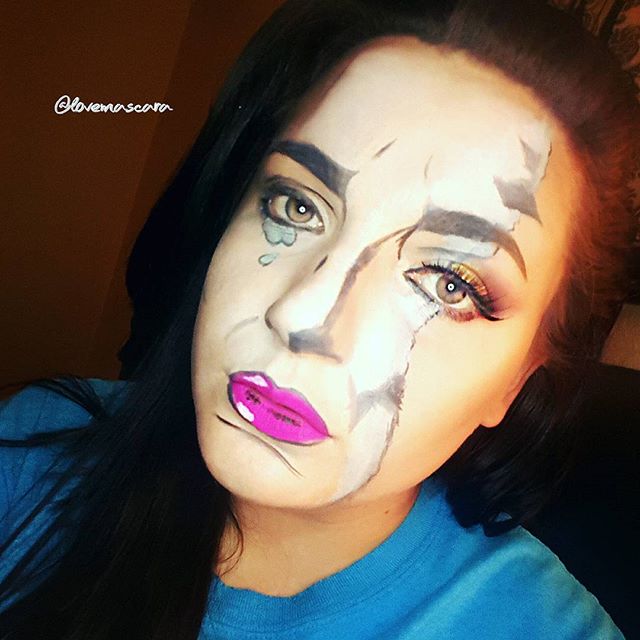 I used the Punker liner for the detailing and drawing of this "torn comic book" look. 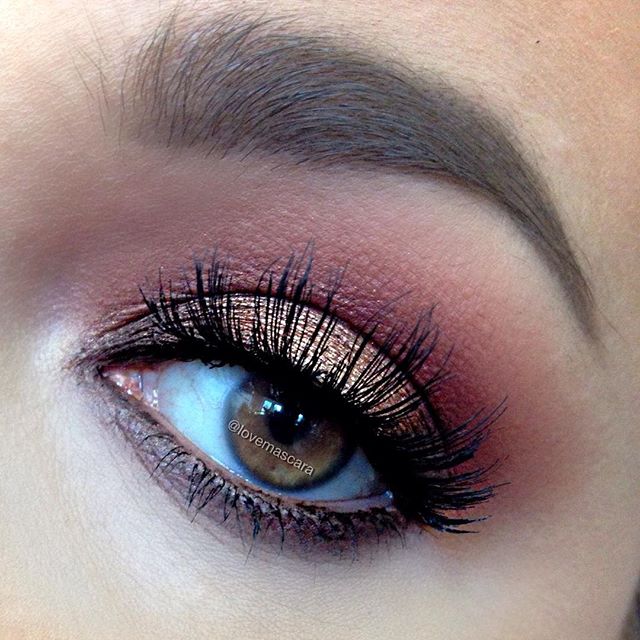 Here I'm wearing Rose Gold shadow in the center of the lid. 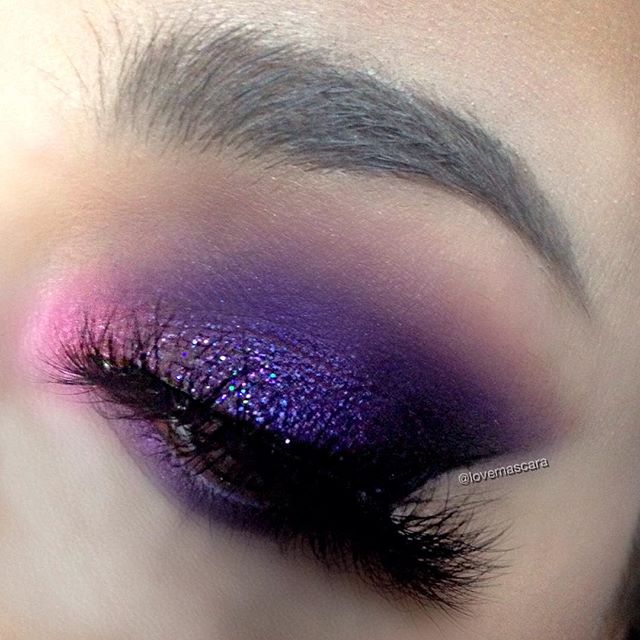 This is basically all Royal shadow with some glitter over top.
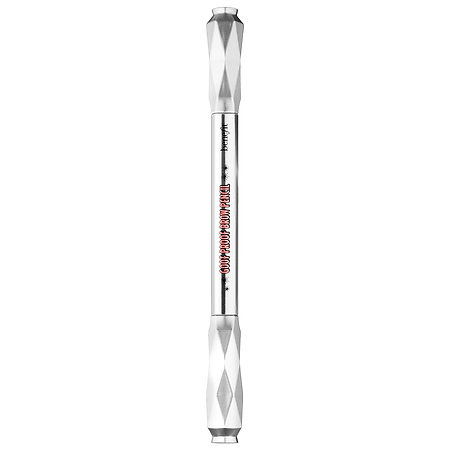
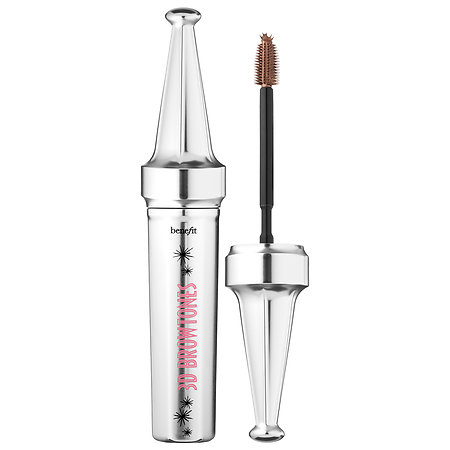
As I said earlier, I am now an affiliate with Ardency Inn so if you use my code "LOVEMASCARA" you will get 15% off your entire purchase on their website. So I've already talked about the new Benefit launch of brow products in the last couple weeks. I did a more in depth review of the Ka-Brow product. So I'm not going to talk to heavily about that. I did get the Goof Proof pencil and the 3d Brow Tones though and I wanted to discuss both of those with you. For reference all 3 products are $24 each. There are roughly 12 products in the whole collection including tools, brushes and all. 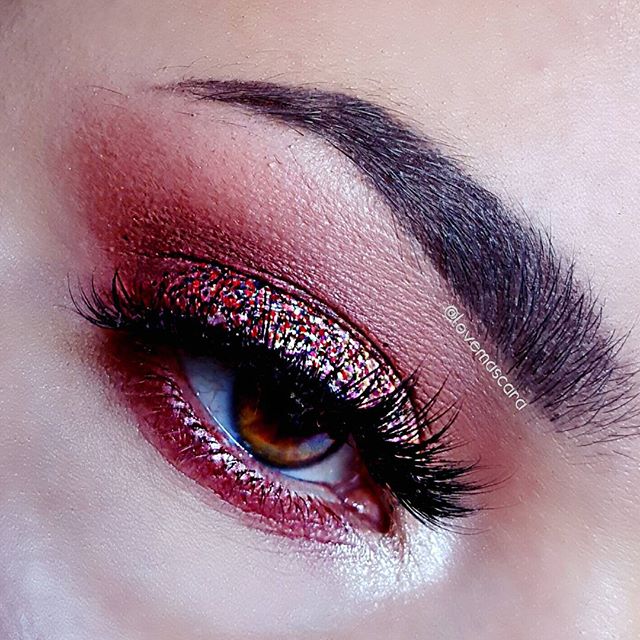 First up lets talk Goof Proof pencil. This pencil on first glance is like a prettier version of the ABH Brow Definer. BUT on closer look it's not exactly angled, it's more diamond shaped kinda as opposed to triangular, with the longer part being the tip of it. I'm gonna get straight to it and tell you that I like this a lot. I think I like it a bit more than the ABH Brow Definer to be honest and I never thought I would say that. This is SO easy to sculpt the brows with where as the Brow Definer is so easy to fill the brows with and give some shape too but not harshly sculpt. This deposits color easier and the shape of the pencil stays pretty thin so it literally GLIDES on the skin. Where I feel like after the Brow Definer has been used quite a bit you have to work harder at getting it built up or shaped the way you want it. Now in saying that, I know this is called the Goof Proof pencil but I have gotten a little crazy with it and made mistakes, it's easy to clean up and it boils down to me not paying attention really. However, it does make brows easier and it's super quick and easy to blend out or clean up but just note it will very easily deposit color where you don't want it if you aren't paying attention. So I use shade 5 just like in the Ka-Brow. There are 6 shades so ideally I would like to see more shades but whatever. I think it's a really good product none the less. Plus the packaging for this entire collection was inspired by "magic wands" and lets just say...I have a Gryffindor scarf in my closet. Soooooooo.......well done Benefit, Well done. 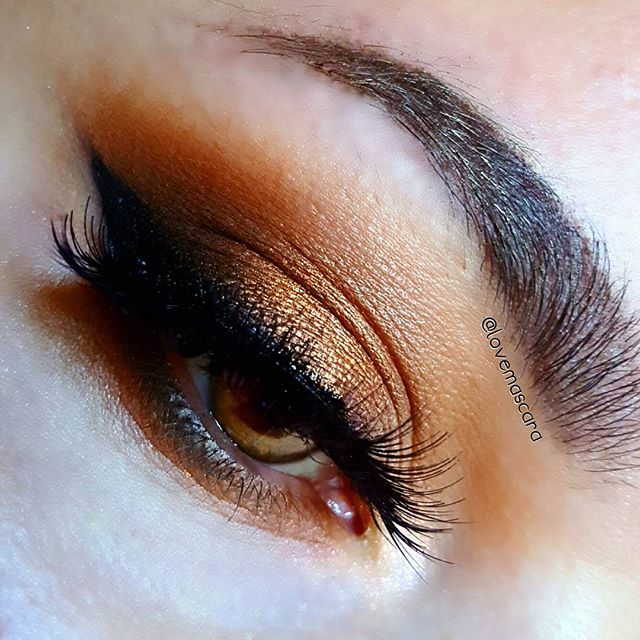 Next up is the 3d Brow Tones. Now these come in 2 shades. I got shade 2 because it was lighter and I heard that if you wanted it to be more noticeable on the brows, to get the lightest shade (2) even if you have really dark hair. So that's what I did. It is noticeable, don't get it twisted it is noticeable when close up. Which you wouldn't want it to be noticeable far away. In pictures of close ups of my eye makeup I see it better than when I look in the mirror. I don't mind how it looks, I just don't feel that it makes it look any more dimensional or more natural looking which is what I've heard several people say that it does. Perhaps it does for them and that's awesome, for me however I don't view it as a game changer or really that much of a help. I like it and I'm gonna keep it but it's something that I sometimes forget to use or that I don't give much thought to. So it's neither here nor there for me. I think it's a very cool concept but it's just not "up-ing" my brow game for me like I thought and hoped it would. Also seeing as I got the lightest shade and it's just noticeable enough I'm guessing the darker shade wouldn't have been noticeable hardly at all in which case I would've been very bummed. 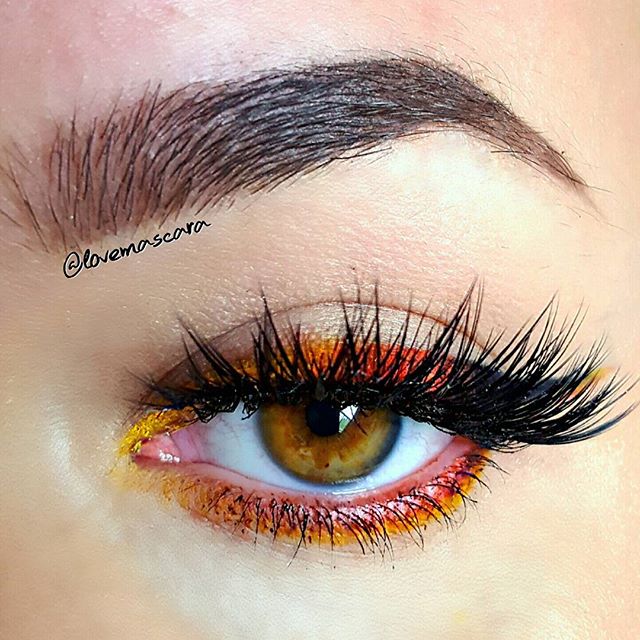 Lastly is the Ka-Brow which I've talked more in depth about in a previous post, which I will link here, so I'm just going to update you on it now. I still don't like the brush but I took some scissors to it and it's vastly improved. I still think it's great for sculpting a brow with a lot of detail. I prefer the Goof Proof to the Ka-Brow personally because it's easier to work with and easier to blend, but if you really want a pomade/gel/cream brow color I would still recommend this one.
So that's it. These are available online and in store at Sephora and Ulta. Remember to use Ebates and get you some cash back on your purchases, if you don't know what Ebates is I'll link that post here. Promo codes for Sephora: Till Monday July 11th, you can get 5 samples instead of 3 at check out and a medium goof proof is one of the options Code VIBOMEGA for the Marc Jacobs O!Mega Bronzer Perfect Tan in Tantric with a $35 purchase. *For VIB and VIB Rouge only as of right now* Code: Sparkle for 1 Summer Essential mini choose 1 of 4 options with a $25 purchase Code: Bouncy for a mini First Aid Beauty Mask 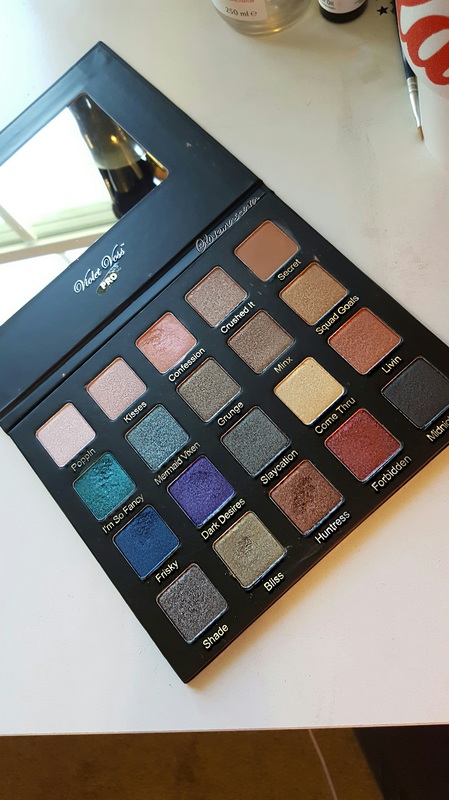 This is the Violet Voss Drenched Metal palette. They previously released the Holy Grail palette which was all warm shades, this palette followed shortly there after and they just recently done a collab with influencer Laura Lee. So as I have a ton of warm shades I wanted the one with more variety of color, not just bright colors but different colors. This one has some odd shades in it and I love that about it. My chief complaint is that there is only 2 real matte shades in this palette of 20 shadows. Luckily one matte shade is a peach shade which is my go to for a transition shade. The other is a basic black that is a bit dry to me and not the darkest black I've ever tried, but it still works. Most of the shades are gorgeous. I'm especially partial to Huntress and Frisky. "I'm So Fancy" is beautiful but I found it harder to work with. It was almost foiled in texture so I tried applying it with my finger and a brush and it wasn't as vibrant as I wanted it to be. It showed up well enough but not what I expected. Same with Dark Desires it doesn't show up as vibrant on the skin as it does in the pan. It's still very pretty though. Like I said, this has a variety of colors in it and I love that. Some are a bit similar in tone so they don't look extremely different to each other. It tends to be the more neutral shades that are similar to each other. A few shades anyway. The things that I love about this is even though the packaging is cardboard and simple, I really like it because it's super thin, light, and easy to carry. Also it has 20 good size shades to it. Which is awesome and most or at least 80% of the palette is super pigmented and good quality. The only other bummer is this palette is in the $50 range. While I think this is a good palette and yes you get 20 shades, I feel for the packaging, and some of the shades being very similar to each other or harder to work with, $50 seems a bit much. I would've like to have seen this $35-$40 maybe. That's just me though. Like I said the 20 shades is very hard to beat. Violet Voss is such an affordable brand though, I guess that's why this price tag is hard to digest for me. That's just my thoughts though. You could feel completely different and that's fine. 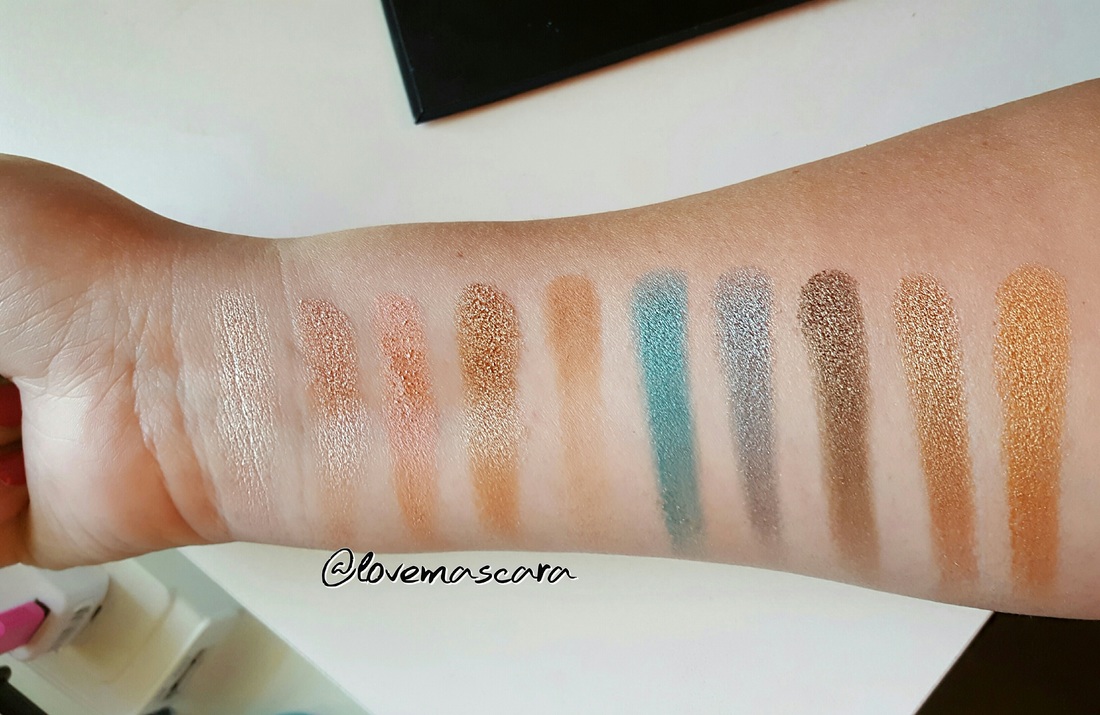 The swatches above are the 1st two rows in the palette. All swatches has only 1 swipe. So from left to right: Poppin - a really gorgeous pale pink and gold duo chrome. Has to be built up though. Kisses - pale pink champagne shimmer which is very pigmented. A bit darker than Poppin. Confession- dead on dupe for the Mai Tai duo chrome from Makeup Geek. I love it. Crushed It - Rose Gold shimmer. Very pigmented. Secret - matte peach with some brown tones. A bit darker than Peach Smoothie from MUG. I'm So Fancy - a foiled type aqua green shade. It was hard to work with in my opinion. Mermaid Vixen - Silvery muted blue green. Not as pigmented as others. Grunge - Golden Taupe Brown shimmer Mink - Warm medium brown shimmer. Very close to Crushed It. Squad Goals - a cantaloupe melon shade shimmer 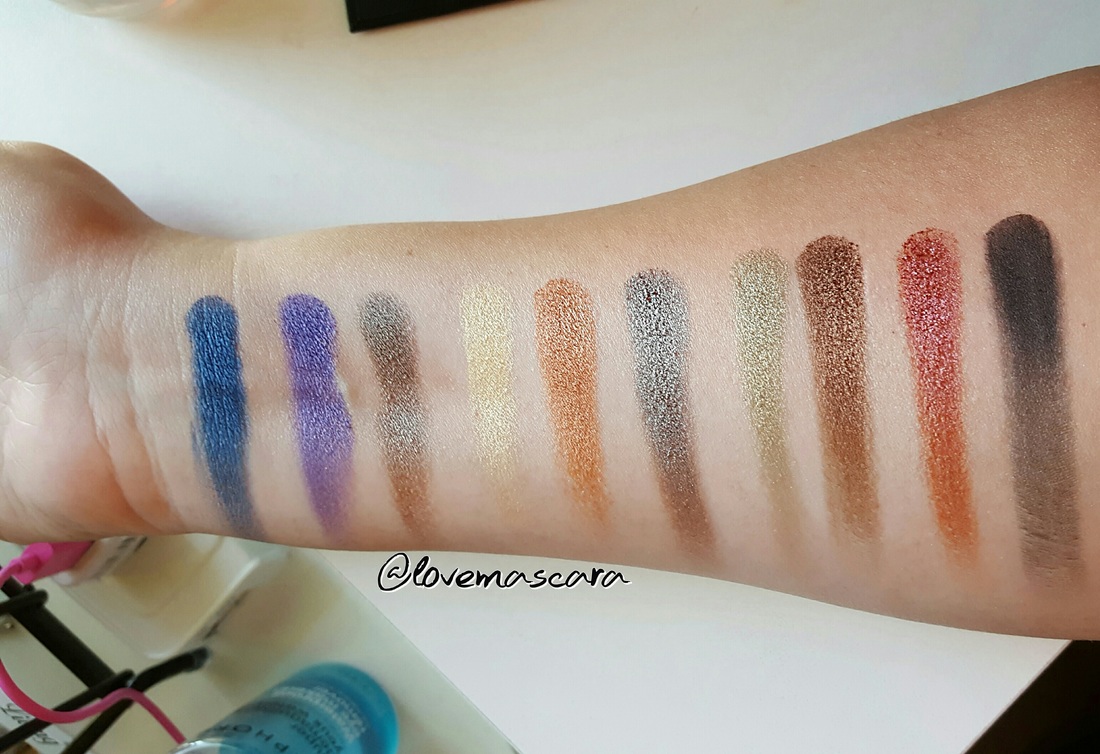 This is the two bottom rows of the palette. Left to right swatches: Frisky - Royal Blue almost foiled. Not as shimmery as the others. I love this shade. Dark Desires - Royal Purple but it really is a lighter shade when applied. I have a hard time with this one. Slaycation - Blue Brown much like Blue Brown pigment from MAC and Insomnia from MUG Come Thru - Pale Yellow Gold shimmer Livin - Copper shimmer. I love this shade as well Shade - Strong Silver with a taupe-purple undertone. Very pigmented. Bliss - Golden Olive Green. Really pigmented. Really cool and different. Huntress - Dark Coppery Brown. I love this shade. Forbidden - Raspberry/Cranberry shimmer. Not dark like a burgundy a true cranberry shade. Midnight Tryst - Matte black. Pretty dry and not the darkest black I've ever seen. 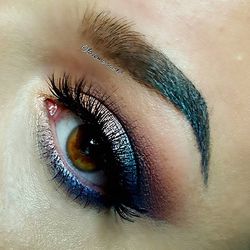 In this picture I'm using Confession on the majority of the lid. I'm So Fancy as outer shade initially and then Frisky is covering it up for the most part because it wasn't working well for me. I used Dark Desires for the purple cast you see in the crease above the navy shade. Secret is in the crease for transition since it's the only matte shade. I also used Frisky and I'm So Fancy on the tail of the brow because I have teal and blue in my hair and I thought it would be fun to add it to my brows. 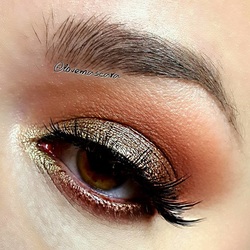 In this pic I'm actually only using about 3 shades. It's Secret in the crease, Bliss on the majority of the lid and Huntress on the outer corner and lower lash line. I really loved this combo. Bliss is a cool olive toned shade, very different and pairs up nicely with the copper in Huntress. 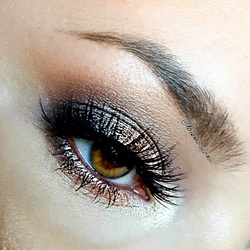 In this pic I'm using Shade on the outer corner. Livin is in the center and Poppin on the inner corner and inner part of the lid. Secret is in the crease and Midnight Tryst is used to deepen the outer corner. This is much prettier in person and pictures don't really capture all the colors. So that's my thoughts on this palette. Overall it's really good. Some of the shades are not as good as the others but that happens a lot with palettes. This has a lot of different and cool colors that you do not see very much at all in palettes, which is one thing I love because the looks you could do are endless with this.
  Summer has arrived. It's in full swing here in Tennessee. So naturally I'm sporting some colorful, down right neon looks to welcome it. Starting with the one above. Strawberry Lemonade (all Makeup Geek shadows): Crease: Tuscan Sun first and the Poppy Lid: white base, outer half is Fashion Addict taking it into the crease as well. Touching up the crease again with Poppy. Then Hologram Pigment on a flat stiff damp brush on the inner 2/3rds of the eye. Lower Lashline: With a pencil brush the outer half is Poppy first and then Fashion Addict. Then with an angled brush I'm using Fashion Addict to trace the bottom of my tear duct. Not connecting it with the lid. Then applying Hologram with the same angled brush only wet. Angled brush needs to be thin so that the pink doesn't go too far down and make you look sick. Lips: Bare With Me from Dose of Colors I'll leave a video for it here.  This one I'm calling "Cantaloupe" All MUG shadows again Crease: Tuscan Sun and Chickadee Lid: Voltage over In The Spotlight. Americano on the outer V Then Light Year Sparkler applied with a glitter glue base. Liner: Ardency Inn Punker liquid liner Lower Lashline: Tuscan Sun and Voltage Link for the video is here.  This one I like to call "Fruit Salad" for it's array of colors. It has more colors to it than the others. All Makeup Geek of course except the glitter. Crease: Tuscan Sun, Fashion Addict, Poppy Lid: Fortune Teller and Mai Tai. 24k Roseate glitter from Star Crushed Minerals. Lower Lashline: Poppy and Black Light on the inner half for the purple cast Lashes: Vamptress lashes from Violet Voss Video for this one is here. 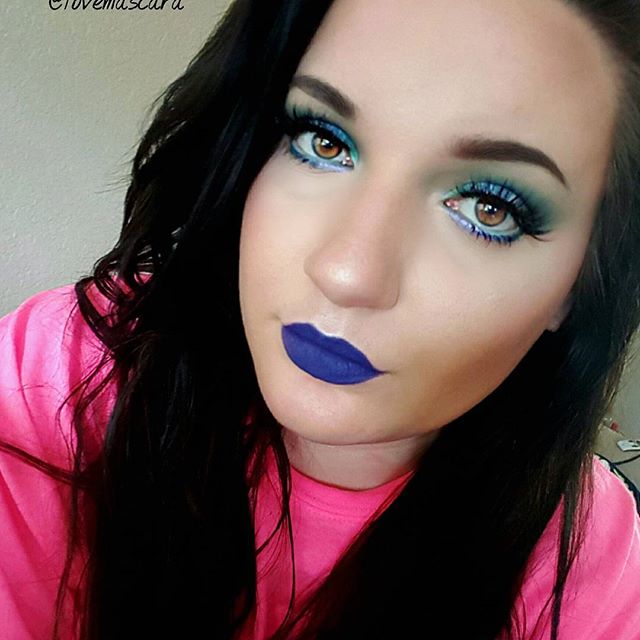 This look is more bold and intense. The lip option can easily change though. There is no video for this one. All the shadows are Makeup Geek as well. I call it "Blue Hawaiian Cocktail"
Crease: Dragon Fly and Sharkbait Lid: Dragon Fly on the inner corner, Chit Chat in the center, and Houdini on the outer lid Lower Lashline: Chit Chat on the inner part, Sharkbait on the outer part Lashes: Vamptress lashes from Violet Voss Lips: Climax Matte X lippie stix from Colour Pop. 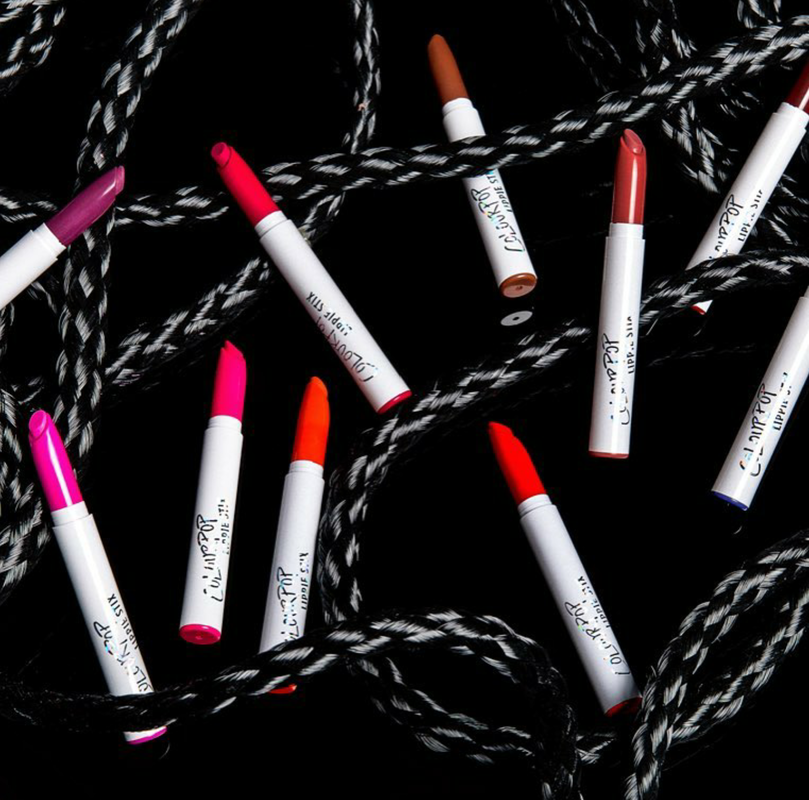 Colour Pop released a new formula of lippie stix. Well not technically new, they released Matte X with the lippie stix Trust Issues earlier. I'm assuming that they realized it was bomb and then they decided to release an entire line. Which I'm in full support of. So they released 15 shades of the Matte X formula. They do have other mattes, these are more matte obviously. So I've heard great things about all the neutral and more wearable colors. However, I heard the ones that were bright and different were harder to work with and of course I went with those. 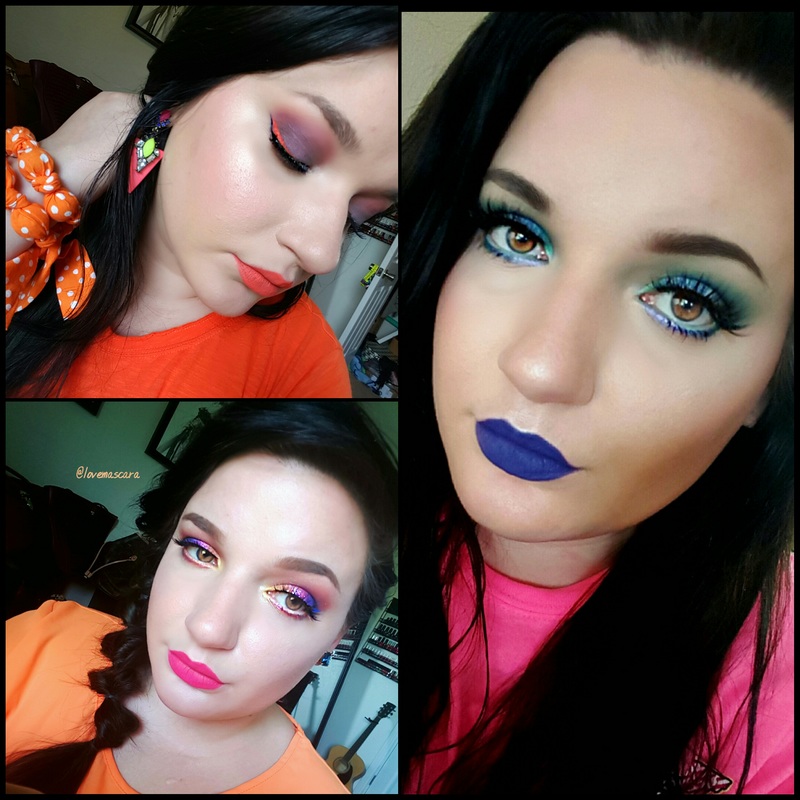 Above I'm wearing Topless on the top left. Barely There is the bottom left. Climax is on the right. 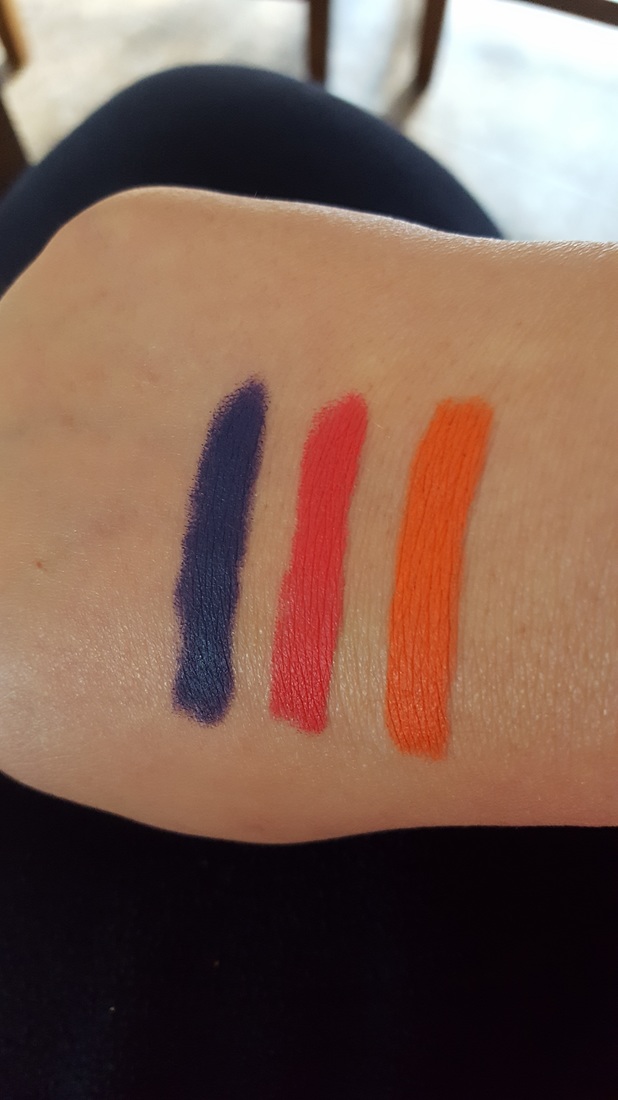 I got two shades that I heard were difficult and then one that wasn't. I personally didnt have an issue with any of them. The swatches above are: Climax, Barely There, and Topless.
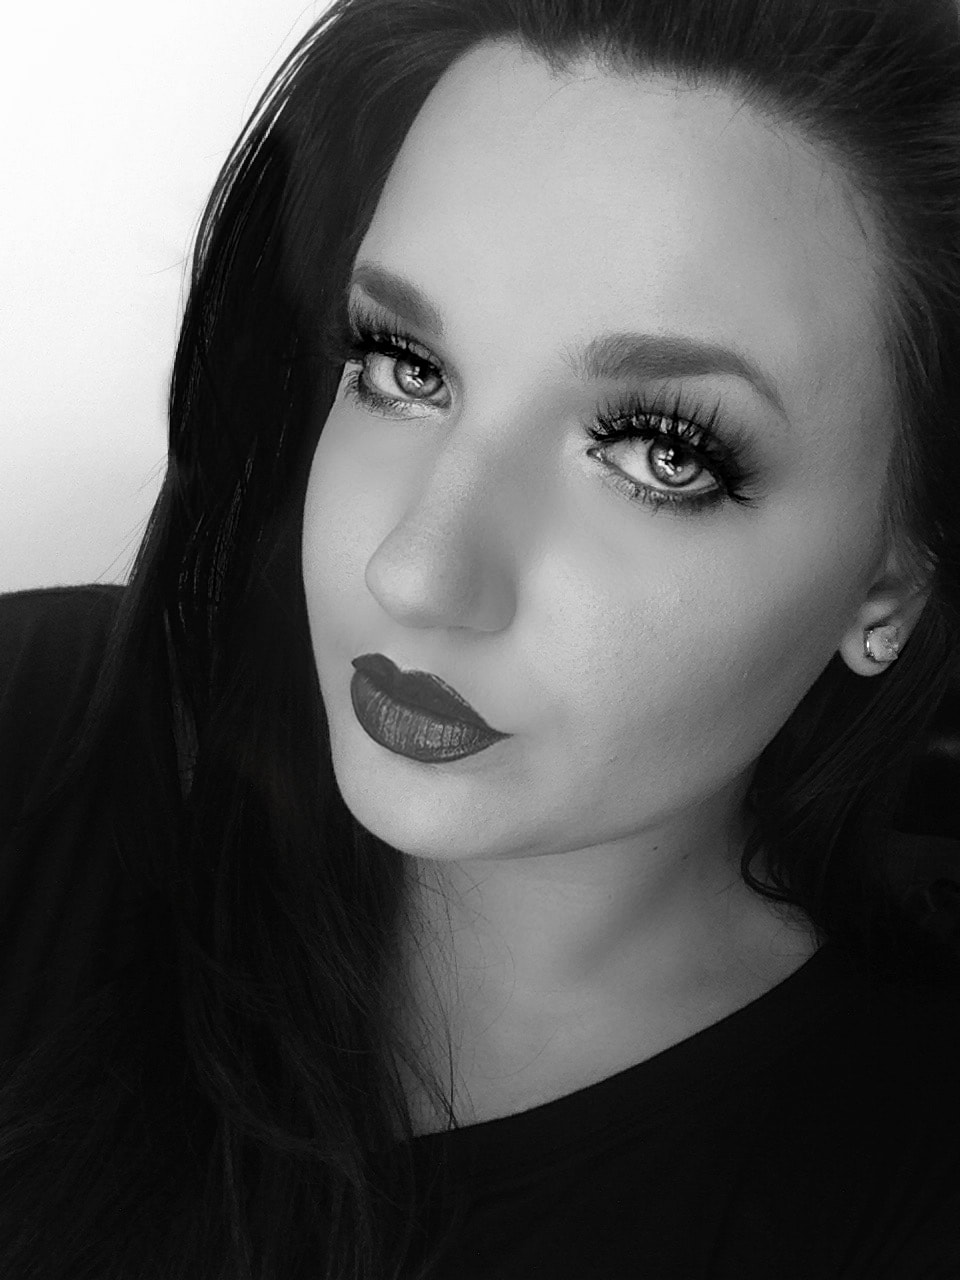
Yes those names are the real names lol. I find them comfortable. Way more comfortable then most liquid lipsticks. They can look a little dry but with a good lip balm they're fine. They wear really well for a long time. If you don't like liquid lipsticks but you need more staying power from a lipstick i woukd get these. They are $5 a piece and you can't beat that. The color Topless is very similar to CP Pacific and Botanicals or in between. Pacific is matte formula and a shade darker than Topless where Botanicals is more like a sherbet color. Barely There is very similar to ABH Sweet Talker liquid lipstick. Super similar. Darn near dupe. Obviously I dont have anything close to the shade Climax which is a matte blueberry color. Most blues that I have are very metallic with shimmer in them. Its hard to find a matte navy blue. So that's it. Short and sweet, they're awesome and I highly recommend them. If you find they do get too dry or look cakey just apply a good balm first. Or use a more moisturizing one if the one you have isn't doing enough moisturizing. Prom season is here and I've put together some looks that should suit most everyone. From intense color, to classic makeup, smokey eyes, and of course glitter! 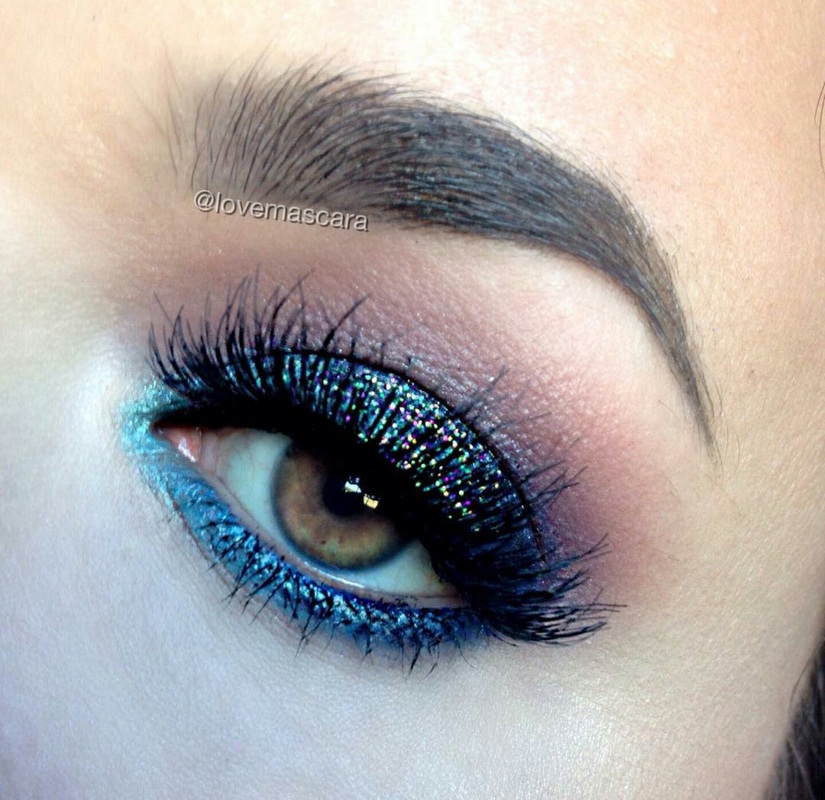 This look is a blue smokey eye with glitter. You could of course not use the glitter though. It's warmed up in the crease with orange tones to keep it from looking like a bruise. Products are as follows: Makeup Geek: Boo Berry as the navy base. Pegasus in the inner corner. Corrupt as definition in the outer corner. Curfew a purple in the low crease, then Poppy an orange shade for warmth with a big fluffy brush so that it's just a touch of warmth. Poolside is the lower lash line and then Boo Berry on the outer half. Glitter is Glitter Injections in Peacock. You could use almost any glitter though that has blue along other colors of glitter in them. House of Lashes Smokey Muse lashes. 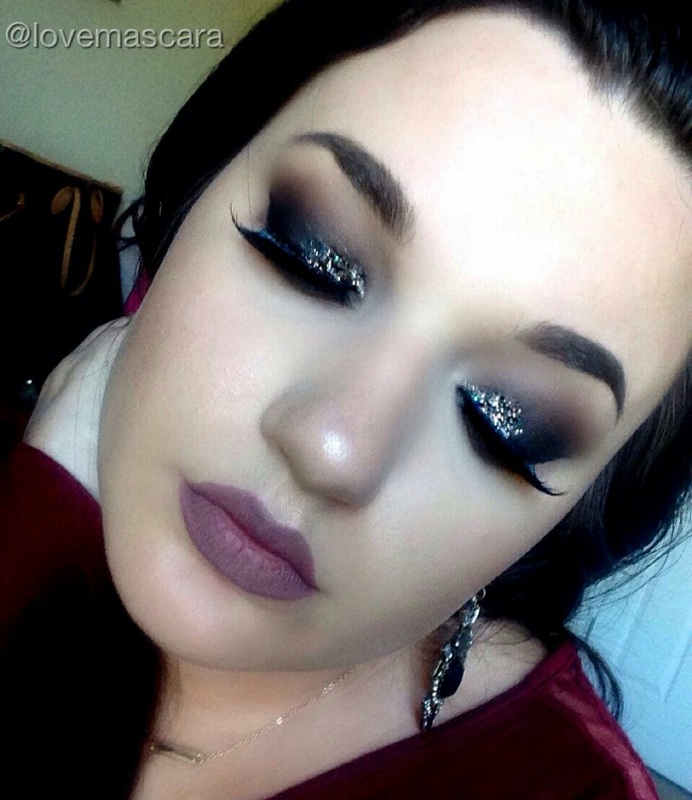 This look is super dark with chunky glitter and a harsh wing. You could use tape to get that harsh line but I don't like that method. I prefer to sketch it out with an angled brush and then liner. If there are any mistakes I use the angled brush to clean them up by dipping it in makeup remover. Products: Makeup Geek Corrupt on the lid. Mocha and Cocoa Bear in the crease which are browns and then Chickadee which is a very light orange is the transition shade. Beauty Bar Baby glitter in Champagne Cocktail on he inner part of the lid. Lips are Colour Pop Rayezor 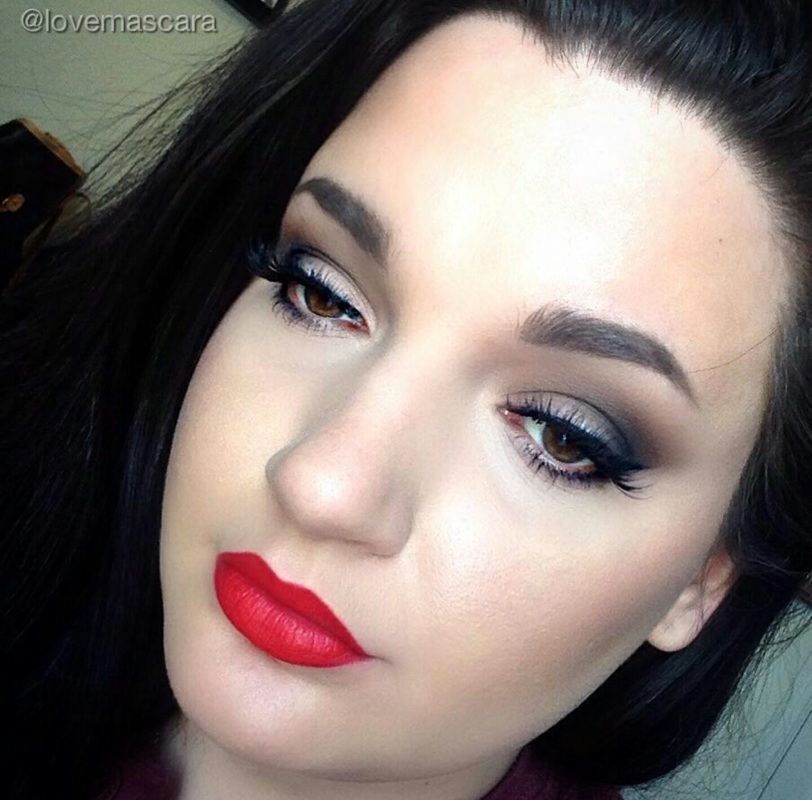 This is a timeless, classic look. With the red lip and matte grey smokey eye. It's beefed up some with the winged liner. Products: Smashbox Cosmetics Art. Love. Color. (I think that's how it goes. lol) all matte grey shadows. Colour Pop gel liner in Swerve Violet Voss Vamptress lashes Colour Pop Succulent on the lips 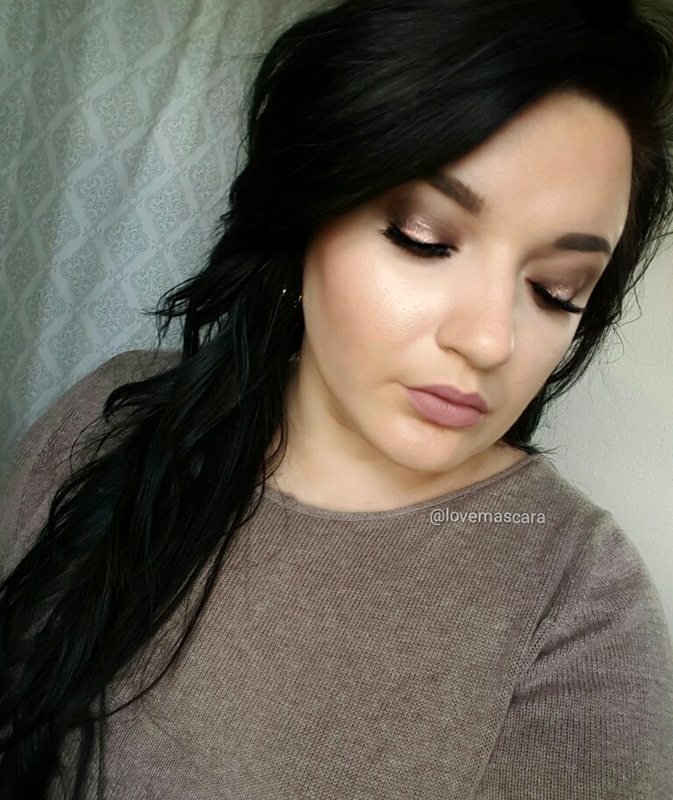 This look is a smokey neutral halo eye. It's dramatic but not incredibly uniform and clean cut. There is no liner with this and you don't have to be so careful blending because not a lot of colors are being used. It's still a great neutral brown smokey eye that works for anything. You could easily change the center color to whatever you want like a more yellow gold, a duo chrome peachy pink, an orange. Something foiled would also be very pretty. Or even glitter. Products: Makeup Geek: Americano on the inner and outer corners and up in the crease some. Preppy as the blending shade in the crease and transition shade. Light Year Sparkler in the center of the lid. Which is a pigment/glitter hybrid that has a peachy pink opalescent color to it. House of Lashes Boudoir Lashes Dose of Colors Stone on the lips 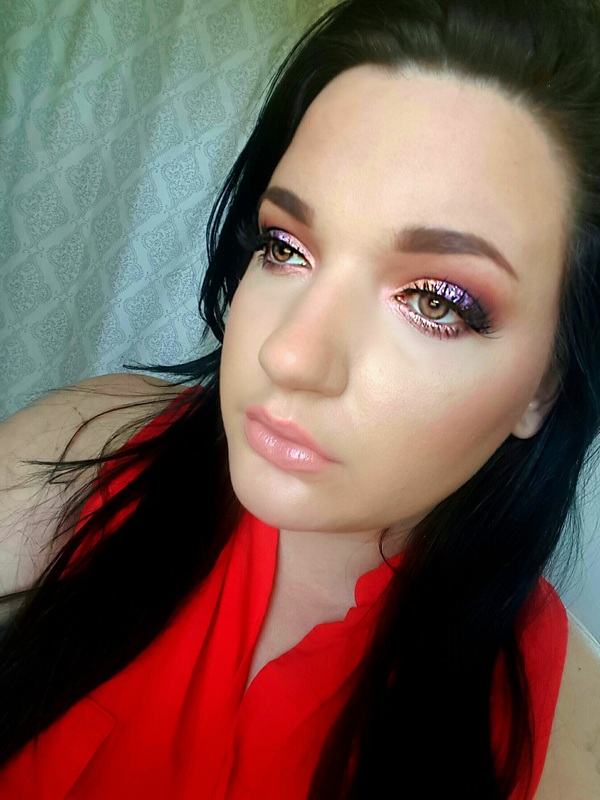 This is a very colorful peach, pink, orange and purple. It's super foiled and bright looking which I love and then glittery with the purple. With a nude pink lip. Also the skin is much warmer as well. Products: Makeup Geek: Chickadee as the transition shade in the crease. Poppy heavily in the crease for it's orange color. Cherry Cola low on the outer crease for definition. Mai Tai on the majority of the lid, inner corner, and lower lash line. Light Year is then put over top of Mai Tai to make it pop more and look more foiled. MBA Cosmetics Pressed Glitter in Amethyst Moon on the outer half of the lid. Pressed Glitter is tricky you have to make sure you have the look exactly where you want it because once you add he primer and pressed glitter (which is more opaque than loose glitter) there is no changing it. Lena Lashes Monroe lashes Melt Cosmetics Sext lipstick Urban Decay Beached Bronzer in Bronzed. Ofra Cosmetics You Dew You highlight 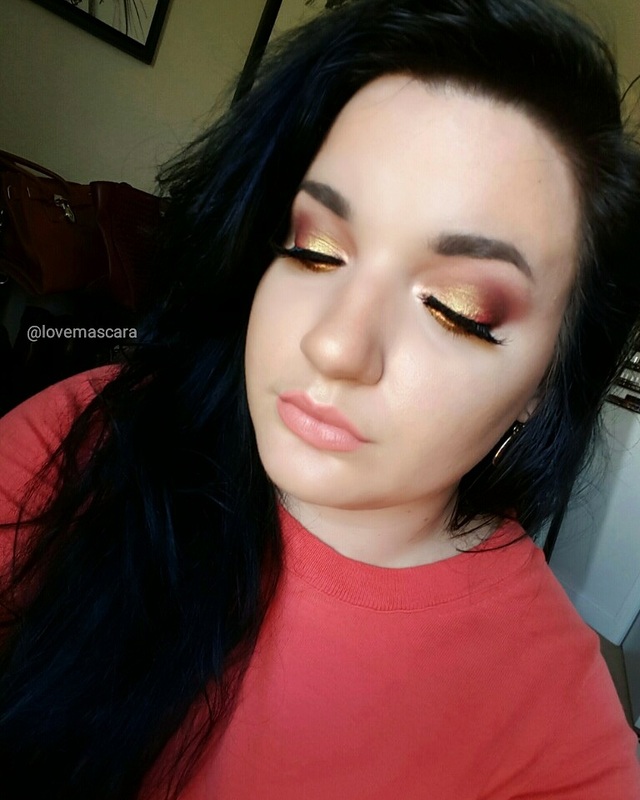 The last and final look which is like a sunset. It'd be gorgeous with red, orange, yellow and maybe even a warm pink dress. It's mainly foiled which I love.
Products: Makeup Geek: Poppy in the crease, Bitten lower in the crease and outer corner, Razzleberry in the center, Fortune Teller foiled shadow inner part of the lid and on the lower lash line. Hologram on the inner half over the shadows. Light Year in the inner corner. Violet Voss Sexy and Eye Know It 3d Faux Mink lashes Color Pop Cake on the lips So these are all looks I think would be great for prom. Hopefully I've put something in for every color dress or ensemble out there. I hope you find one to your liking. If you're doing makeup yourself be sure to play around about 2 weeks in advance to perfect and find what you like. If you're on a budget check out etsy for glitters like Beauty Bar Baby, or Fairy Vibez for pressed glitters. Also the drugstore has come a long way as well. NYX has a great concealer out right now called Gotcha Covered which is full coverage as can be. Milani 2 in 1 foundation is a great full coverage foundation. Lashes are super easy to find, I recommend Ardell Wispies everytime or a half strip of lashes. Physicians formula has good bronzers and of course NYX contour kit is good as well. Good luck and be safe!! 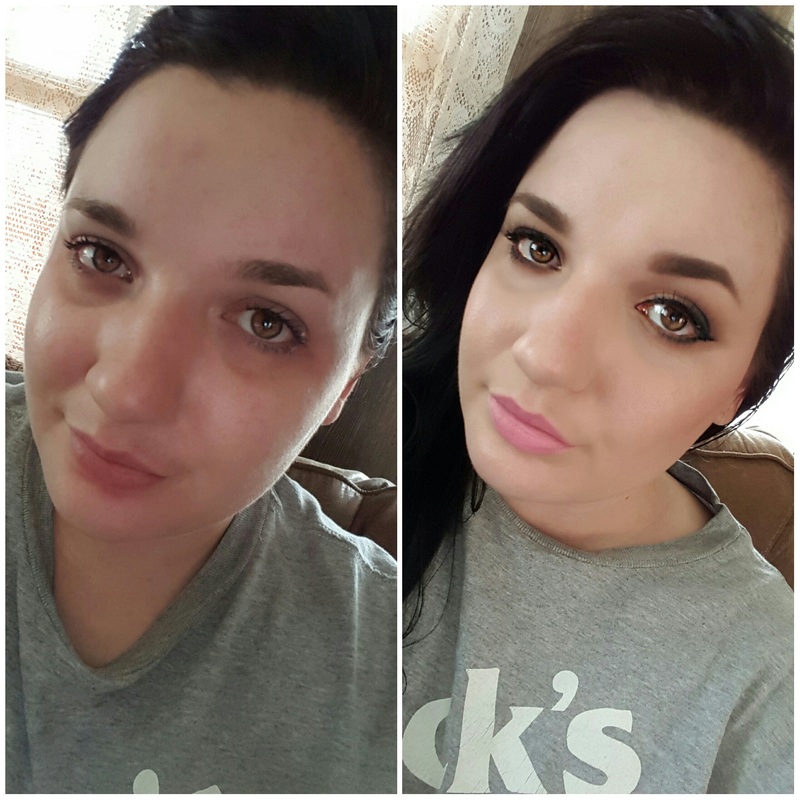 My friend Melissa, who is a Beauty Vlogger on Youtube, and I were discussing negative comments we get about our makeup and one thing led to another and we decided to do this Dollar Store Challenge. Not only is it fun but it is a CHALLENGE. We basically wanted to know if it takes mainly good skills to apply makeup, good products that do all the work or about half and half. Plus not everyone has tons of money to spend on Sephora or even drugstore (ie: Walgreens) makeup these days. So going as low as we could we decided to try out this challenge at our own dollar stores to see what we could find and how we were gonna make it work from application like brushes, sponges, etc to actual makeup, and for me even correctors. So we had to get creative. Here is Melissa's video: *FAIL* Dollar Tree Makeup Look Her Instagram: @melissa.juliet Her Snapchat: @melissa.juliet 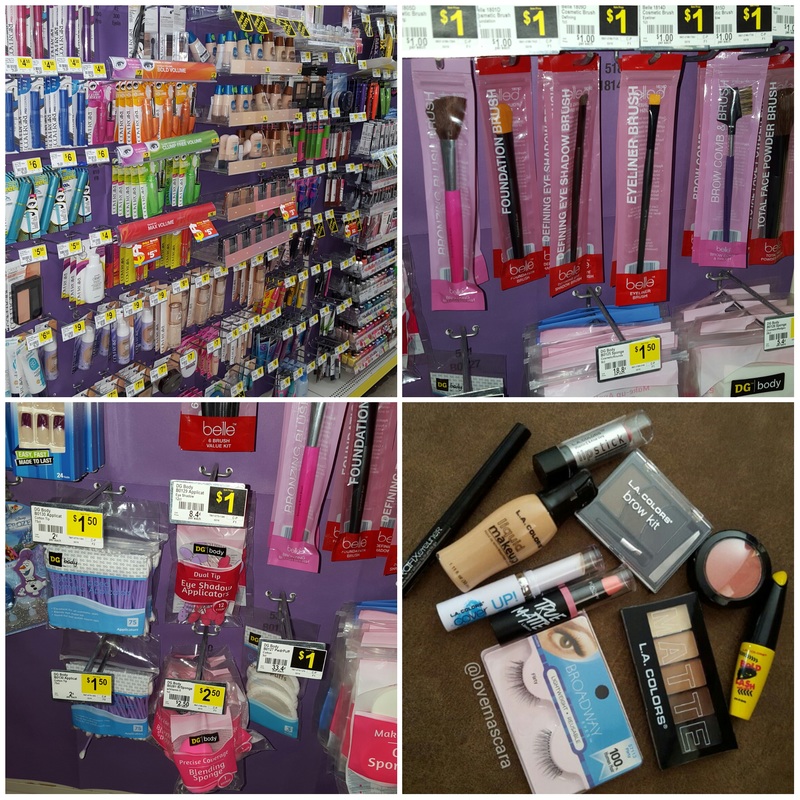 This is my local dollar store. It actually has quite a large makeup section but staying true to the task I went for the lowest price possible which was LA Colors. So basically everything I got was LA Colors and 2 things I think were Broadway Colors or something. The brushes were also $1 I only found two and there was no blending brushes, also got a Beauty Sponge. So I got: L.A Colors Graphixeyeliner in black L.A Colors Brow Kit in Medium L.A Colors Liquid Makeup in Buff L.A Colors Cover Up Pro Concealer Stick L.A Colors Matte palette in Brown Tweed L.A Colors mascara in Bold Lash L.A Colors blush in Natural L.A Colors lipstick in Dream Broadway Colors True Matte lipstick in Pink Drop Broadway Eyes lashes in Flirty Beauty Sponge Liner Brush Shader Brush Total Spent $26 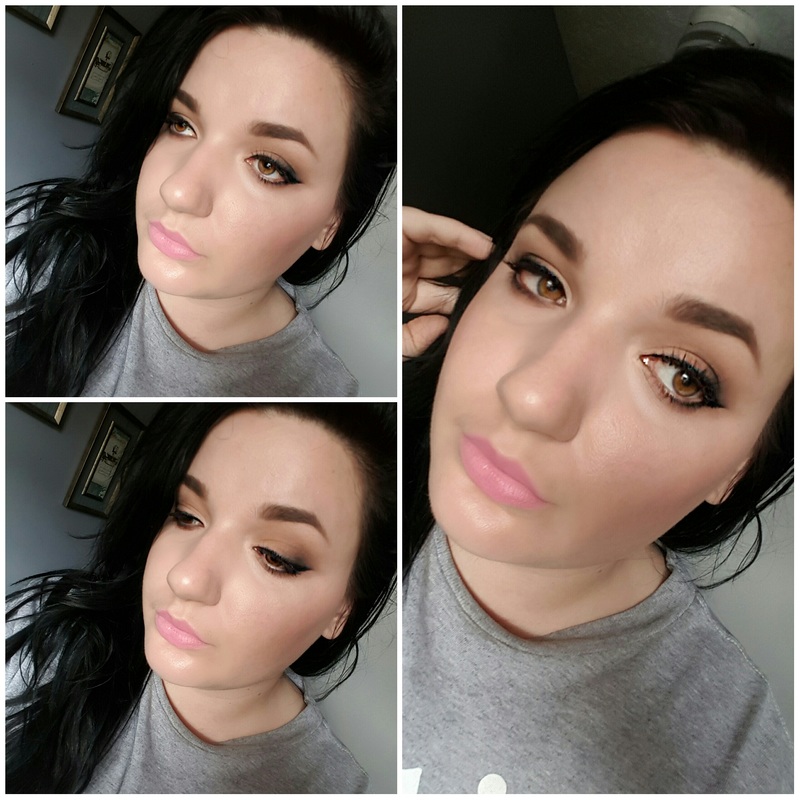 So first off, I needed some type of corrector for my dark circles. So I used the lipstick in Dream, which is a pinky peach, under the eyes. I applied it very very lightly. It was a bit too bright but it worked. Next up I added a layer of concealer under the eyes, and in the T Zone so that the center of the face would have some highlight. Then I used the foundation. The foundation didn't have good coverage it was like a sheer, possible medium coverage so I had to add more concealer on afterwards to get about a medium coverage.
Next up I used the Ivory powder in the Matte eye palette to set the under eye area with the shade brush. Very very lightly. It didn't have a ton of pigment so it worked fine for setting everything under the eye. Moving onto blush this was a disaster. The brush it came with was terrible naturally and the blush itself had lots of sparkle in it. Maybe using a real blush brush would've done better but I AM COMMITTED. So I applied wayyyyy too much and then had to buff it out with the sponge. I tried using the eye shadow to contour some but it didn't hardly work out, it mainly just buffed completely away. For the eyes I used Matte shadow palette and just basically accomplished a smokey warm eye with a very smoked out liner. Speaking of liner I used the liquid liner and it was not easy. It was such a stiff applicator and dried so quickly that is was nearly impossible to make a clean wing. Therefore, I had to smoke it out which I liked better. I used the eyeliner straight brush to apply black shadow to the wing and help make the look more pulled together instead of a mess. I also used it smoke out the lower lash line as well. Then I used the mascara which seemed to work pretty well. I applied the Broadway Flirty lashes and I LOVE these. They're the perfect size for a natural look, not too long and fits the eye perfectly. I just lay them down in the center. You can hardly see them but I love that, they look like your lashes but better and you don't even feel them. Next for brows. I used the little brow kit that came with tweezers and a mini angled brush. It has three colors all cool toned browns from medium, dark, to black. I used the middle shade the dark brown. This actually worked really well. I would prefer one of my regular angle brushes but like I said we're COMMITTED. For lips I used the True Matte lipstick in Pink Drop. It's like a bubblegum pink which I wish I would've chose a different color but too late. This was very opaque and pigmented but it looked a bit dry and clung to dry patches on my lips. I believe it was just $2 if that and for that price I don't mind it looking a tad dry and I may go back and get some other colors. So all in all this was a very challenging and I'm so glad I done it. I'm so glad Melissa asked me to do it with her. Our conclusion is having good products makes a huge difference but so does having good tools. Not all brushes are super expensive either. Just check out Morphe, Crown Brush, or even Coastal Scents and get some basic brushes. Also try a real beauty sponge like the Real Techniques Miracle Sponge. Yes it does take some skill to pull off a flawless look but it takes good tools and at least decent products. Not to say that all these products wee duds. Only two or three of them were. So don't sweat it. If you wanna save some money and get some inexpensive products I do recommend the lipsticks, eyeshadow palettes, even the concealer if you aren't covering tons of blemishes, the lashes I love, and the Brow Kit. Also maybe a mascara when I find one that I really like. Jordana also has nice products for a very low price as well. The sponge I don't care for, nor the eyeliner or blush. So that was my challenge I'm linking some videos on my Instagram of how it went applying these along with some fails: Part 1 here Part 2 here Fails here  Spring is right around the corner. So lets roll into some Spring makeup and transitional makeup to give you a bit of color but not too much. As you know I'm a huge fan of color but with spring I think of pastel bright shades in greens, lavender, light blues, light pinks, and pale yellows. When I think of makeup I think of bright coral lips, bright pinks, and lilac shades. So it's more than being just colorful, it's the right shades of color. However, I'm not here to tell you what you can and can't wear as I myself tend to break any makeup rules there might possibly be out there. I have no problem wearing a navy blue or black lip in the dead of summer. So whatever floats your boat but for the sake of Spring colors lets have fun with some spring shades. The picture about is a Spring Transition look as I like to call it. It has a pop of color but very neutral as well. Top lid: MUG Voltage (inner half) Mocha, Corrupt (outer color of lid), Cocoa Bear (crease) Chickadee (crease) Lash line: Dragon Fly, and a bit of Corrupt on the outer part of the lower lash line. Lashes: Violet Voss Just Slayin 3D Faux Mink lashes ABH: Brow Definer in Dark Brown You could trade out that lower lash line with any other bright shade. I think an orange shade or periwinkle or lavender would be just as pretty. 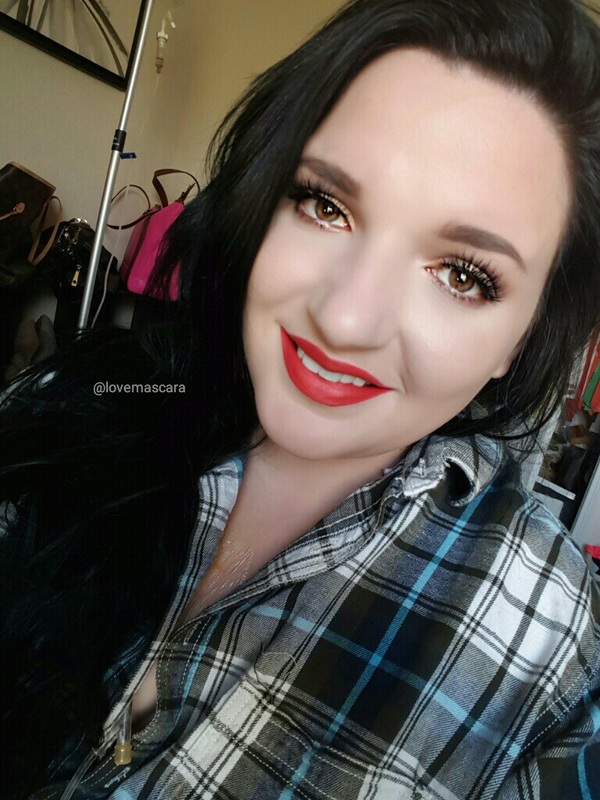 Next up is adding a super colorful bright lip to a toned down neutral eye. I chose a red/coral lip for this. The eyes are nothing special just a warm brown in the crease and a light shimmery lid. The lips are Colour Pop Satin Liquid Lipstick in Cozy. Which is very similar to Colour Pop Matte liquid lip in Succulent. Only Succulent is more red and Cozy has a bit more orange. Both are bright as can be and gorgeous. I prefer the Satin formula more though. 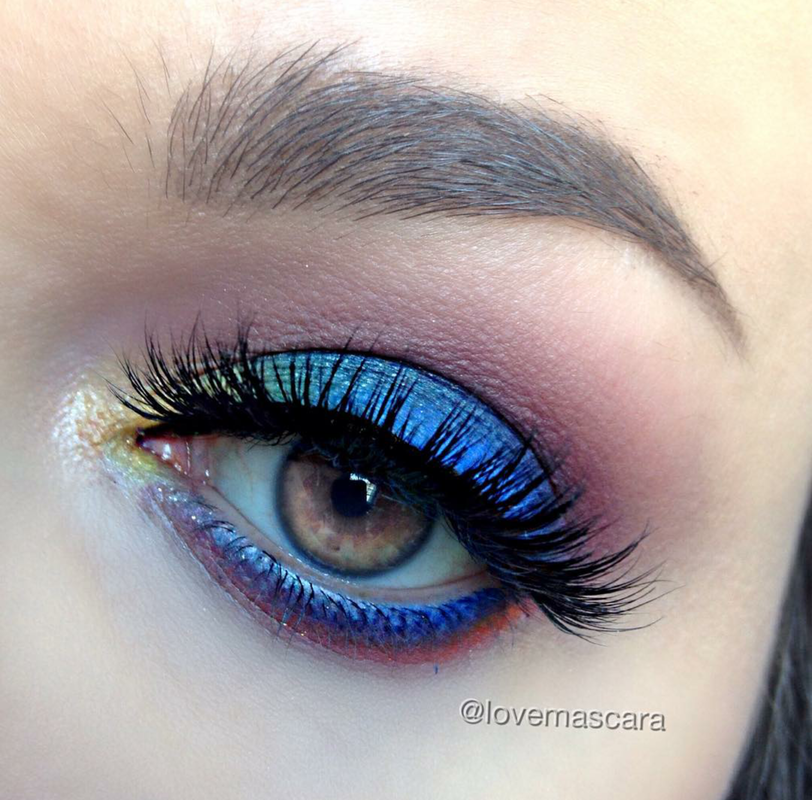 Here we have some INTENSE color. I know it's super colorful and not everyone would wear it but when I think of Spring I think of two things color, and the fact that you can use more makeup in the Spring than the Summer. In Summer I feel like less is better because everything just melts off your face and feels super heavy. Things run and move around, so in the Spring I feel like you can get away with more. This look is: Sauce Box Temptation Palette for the whole thing. You could add or take away things from this obviously. The blue in this reminds me of Neptune from MUG so that's an option if you don't want the palette. Also the orange reminds me of Dark Mango from Coastal Scents. So these shadows can be duped. The yellow I can't really dupe cause it's so hard to find super pigmented yellows. The only other one I have that would work is from the Melt Radioactive stack. If you wanted it to be more toned down then Yellow Brick Road from MUG would work I think. 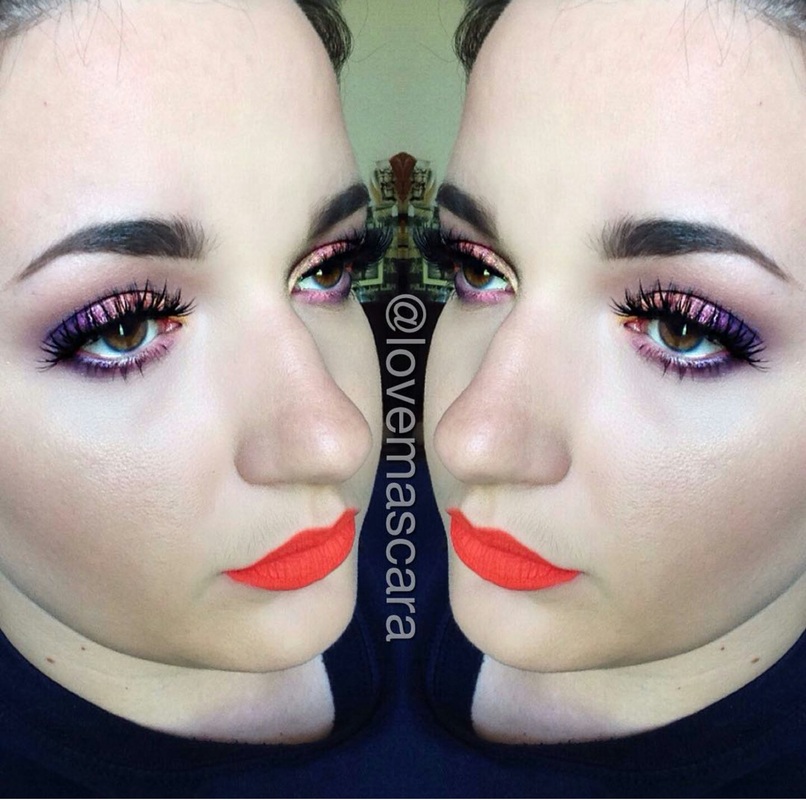 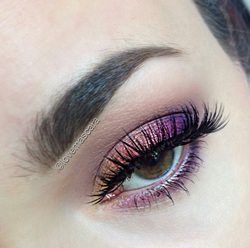 So this look has more color and brighter colors on the lids and lips. This is full blown spring and summer in my opinion. Not transition with a pop of color just all color. The lips are Colour Pop ultra matte liquid lipstick in Pacific that is a bright orange. The eyes are: Colour Pop shadows: Fantasy, Heat, and Animal You can also use a bit of black to deepen that outer corner if you want. Koko Lashes in Foxy 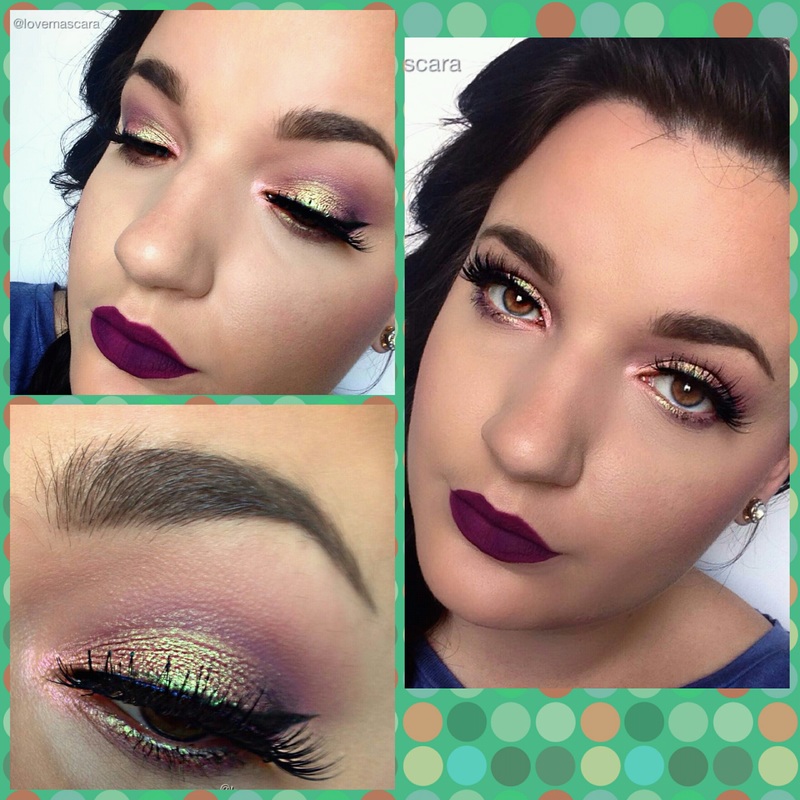 This is the final look. It's very iridescent and pale colors. With a duo chrome pigment. It's just an "enchanting" look in my opinion. The lip I went with is dark purple but you could use literally a ton of shades with this like pale peaches, lavenders, pinks, nudes, even coral in my opinion. The dark lip just helps balance out the look I think.
Eyes: MUG shadows in Mai Tai (inner corner) Wisteria (crease and lower lash line) a bit of Corrupt on the outer corner. Pigment in Hologram applied with a damp brush in the center and inner part of the lower lash line. MUG Immortal Gel Liner Violet Voss lashes in Vamptress Lips Colour Pop Zipper |
ErinI'm from Tennessee. I'm a makeup and skincare lover. I have always enjoyed creating looks but I love to help people with product knowledge and application even more. I've been able to start blogging and do these things I love because God has seen fit to bless me with the opportunity. Thanks for stopping by and visiting with me! 

 
Categories
All
Archives
January 2022
|

 RSS Feed